In this article, we present a case study of the combined use of immediate implant placement and GBR in the anterior maxillary region, and we will discuss key factors that contribute to a successful outcome, including the importance of preoperative planning, aesthetic considerations, and soft tissue management. By reviewing case studies and recent advances, this article provides insight into how these techniques can be effectively used to restore function and aesthetics to the aesthetic zone, ultimately improving patient satisfaction and long-term implant success.
INFORMATION
Patient Name: Zhang
Sex: Male
Age: 59 years old
Chief Complaints:
The patient reports that tooth No. 22 is loose.
Treatment Required:
Assessment and intervention for the loose tooth.
Present History:
Tooth No. 22 has been loose for several years without treatment.
Anamnesis:
No significant past medical history.
Drug Allergies:
None reported.
CLINICAL EXAMINATION
Intraoral Examination:
- The alveolar bone height is reduced by less than 30%.
- Irregular dentition observed.
- Crossbite noted at Teeth No. 12 and 22.
Patient Complaints:
- Tooth No. 22 is slightly darkened and exhibits grade 3 mobility.
- Percussion test: Negative.
- No swelling or blisters in the gums.
- Periodontal pocket depth: 6 mm.
- Defects were observed in the mesial and distal gingival papillae.

IMAGING Examination: CBCT
Pre-op CBCT shows that the height of the buccal side of the alveolar bone in Teeth No. 21 reaches to the apical. The lateral alveolar bone reaches 1/3 of the apical. Low-density shadows can be seen around the roots. The width of the alveolar ridge is 6.41 mm.

The case of the 22 coronal CBCT: The width of the lingual side of the alveolar ridge was 6.41 mm, 1/2 of the vertical bone was missing, and there was no vertical loss of soft tissue.

ESTHETIC RISKS
Esthetic risk assessment: Medium risk
TREATMENT
PRE-OP PLANNING
- Full-mouth care and oral hygiene education one week prior to surgery, including the use of Chlorhexidine.
- Venous blood is drawn for PRF (Platelet-Rich Fibrin) preparation before surgery.
- Perform minimally invasive tooth extraction.
- Use angled incisions for optimal access and minimal tissue disruption.
- Immediate implantation with Guided Bone Regeneration (GBR) procedure.
- Decision on wound closure: Open healing or tightly sutured wound?
- Respect the patient’s decision not to opt for a temporary fix.
- Consider and discuss regular, permanent solutions for the patient’s needs.
PROCEDURE

- Use 12#Blade to make inner incisions in gingival sulsus of the Teeth No. 21, 22 and 23 and vertical additional incisions in the mesial position of the Teeth No. 24

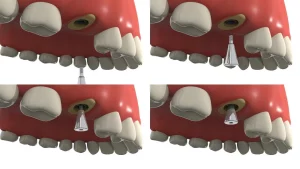
2. Mucoperiosteal flap is cutted and pulled aside. The buccal side of the alveolar bone in Teeth No. 22 is exposed. The Teeth in No. 22 is extracted through minimally invasive surgery.

3. Tooth extraction wounds in Teeth No. 22 is scrapped,The surface of the alveolar bone in No. 22 and the pit are exposed

4. Soft Tissue Extend, a surgery that doesn’t cut the periosteum, is used to release the tension.
Record the length of the original soft tissue flap after flap and scrape the soft tissue flap using W-tension Release Comb

5. Repeatedly scraping the soft tissue flap with W-tension Release Comb can lengthen the soft tissue flap without cutting the periosteum.

6. The before and after while using W-tension Release Comb: The length of the soft tissue flap was extended 8-9 mm

7. Use Positioning Drill to position and drill holes step by step

8. The hole is drilled: Choose DMD Ø3.5*11mm

9. Screw DMD Ø3.5*11mm with the initial stability of 30N

9. Place Healing Abutment

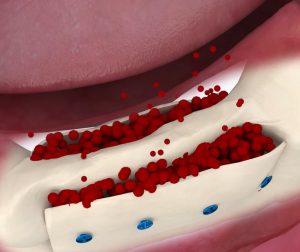
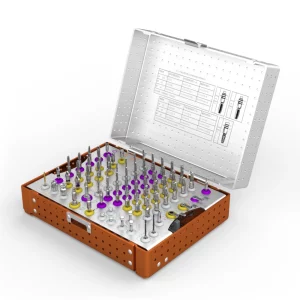
10. GBR procedure: PRF collagen membrane was prepared by venous blood drawed before surgery, Prepare the GBR kit (the GBR kit used in this case is from DentalMaster).

11. Bone grafting material is placed at the buccal defect 3-5mm beyond the bone defect area and is pressed vigorously

12. Cover with trimmed biomembrane in bone grafting area (3-5 mm beyond the area as much as possible). The biomembrane surface is cross-covered with PRF membranes

13. Because the biofilm has certain antibacterial activity and is protected by PRF, tooth extraction can be tried to open healing, ensuring that the in-situ suture of the gingival papilla and the position of the membrane-gingival symphysis remain unchanged, which is conducive to the aesthetic effect in the future, and the routine oral care, gargling, and antibiotics for 5 days after surgery
IMMEDIATE POST-OP IMAGING-CBCT

Post-op CBCT:Excessive bone grafting on the labial side is expected to achieve bone regeneration of >2m

POST-OP FOLLOW-UP

5 days after surgery, the patient requested re-examination for removal of the nylon sewing because it pierces the mouth. The gums are slightly swollen. There are no signs of infection, and fibrin is visible in the wound.

Gum condition after suture removal

The incision area was treated with chlorhexidine antibacterial gel, and the patient was instructed to rinse his mouth and maintain oral hygiene
REPAIR PROCESS

Follow-up 20 days after surgery, PRF was completely absorbed. The collagen membrane remnants and epithelial covering were visible.

After 8 wekks follow-up visit, the soft tissues was healed and the keratinized gums were healthy

4-5 months after surgery, the apical x-ray showed an ISQ of 70/73 in buccal and lingual side.

CBCT 4-5 months after surgery

Conventional impressions were made and repaired 5 months after surgery

The final prosthesis
POST-OP DISCUSSION
This case involves the extraction and immediate implantation of a loose single tooth caused by a periodontal-endodontic lesion in the esthetic zone. The patient presented with irregular dentition, a long-standing periodontal-endodontic lesion in the affected tooth, a Class II tooth extraction socket, general oral hygiene, and a relatively high risk of immediate implantation in the esthetic area. Despite these challenges, the patient achieved relatively satisfactory implant restoration results. The following observations were made from a systematic review of this case:
- Preoperative Aesthetic Risk Assessment and Imaging Analysis: The foundation of successful clinical work starts with a thorough aesthetic risk assessment and imaging analysis. Minimally invasive tooth extraction and standardized surgical techniques were employed, with particular attention to correct three-dimensional implant placement. Ensuring initial stability was crucial for the success of the procedure.
- Closure of Soft Tissue Wounds: The closure of soft tissue wounds was a critical step in the process. Due to the existing tooth extraction wound and the lack of soft tissue, closing the wound proved to be challenging. Additionally, excessive bone grafting was required in the guided bone regeneration procedure. Reducing the tension on the soft tissue flap was paramount. Rather than using the classic periosteal incision and reduction method, we opted to employ a self-developed technique for soft tissue flap scratching and lengthening—without making a periosteal incision. This technique, termed “Soft Tissue Extend,” allowed for an extension of 8-9mm of the soft tissue flap, effectively reducing the tension and preserving the blood supply to the soft tissue and periosteum in the bone grafting area.
- Use of PRF and SIS Biomembrane: To minimize the risk of wound exposure, Platelet-Rich Fibrin (PRF) combined with Small Intestinal Submucosa (SIS) absorbable biomembrane was used to cover the exposed wound area. SIS biomembrane offers superior anti-degradation performance compared to conventional collagen membranes, with enhanced hydrophilicity, elasticity, and antibacterial properties. This allowed for selective “open healing” in the oral environment and expanded the indications for open healing in alveolar ridge preservation procedures. The open healing process enabled the gingival papilla and membranous gingiva to be sutured in situ, laying a strong foundation for achieving optimal aesthetic results.
- Prosthetic Stage: During the prosthetic phase, a custom impression model was used, and a custom abutment screw was placed. This approach corrected the original crossbite of the affected tooth, with the restoration being modified to provide as much shallow coverage as possible. This improved the aesthetic outcome. However, the lack of an immediate temporary prosthesis, due to patient-related factors, did affect the post-operative aesthetic results to some extent.
- Conclusão: The observations and techniques described above represent the personal experience and insights gained from this particular case.


